Labels

Saturday, December 31, 2016

Misc. wing fit work: 2 hours

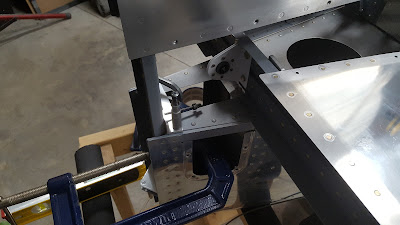
  • I got under the wings and drilled the fuselage skin to the wing using a #40 hole finder. These holes will get enlarged for plate nuts.
  • Fitted the left fuel tank bracket. The plans recommend a 5 degree bend but in my case the left bracket required only a very slight bend to fit.
  • Drilled bracket to fuel tank. I used a piece of brass tubing for a drill bushing then enlarged and reamed the hole. 
  • The fuel tank bracket is designed to let the fuel tank separate from the fuselage without rupturing in the event of a crash.

Left fuel tank bracket fitted and drilled:


Bending bracket:

Using the hole finder underneath the wings / fuselage:

Friday, December 30, 2016

Finished vertical stabilizer mounting: 5 hours


  • Vertical stabilizer is now complete drilled and fitted to the fuselage and horizontal stabilizer! I still need to disassemble, deburr, clean and prime everything that needs it. After that the vertical stab connector plate will get riveted onto the vertical stab forward spar.
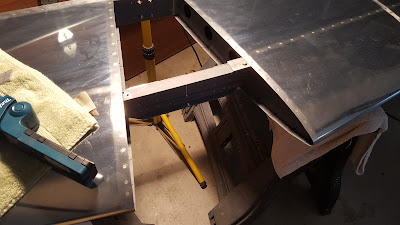
  • I started this process by making and adding a .063 shim to the horizontal stabilizer. This was recommended by various forum members and will especially apply to my plane because I will have a more aft cg with the ballistic parachute.
  • I then doubled checked the fit and alignment of the vertical stabilizer and drilled the connector plate to the vertical stab forward spar using the angle drill.
  • After deburring and cleaning up the connector plate I started on locating the holes for the AN4 bolts that secure the vertical stab rear spar to the fuselage and tailwheel mount.
  • Locating these holes took a long time - probably over and hour. This is essentially blind drilling with fairly close tolerances. It involved a lot of tricky measuring of the inside of the fuselage and tailwheel mount then transferring these measurements to the outside drill point. This was a case of measure several times then check measurements many more times, repeat, etc.
  • I did follow another RV builders advice of moving the upper bolt holes 1/8" inboard. That worked out great and gave me a little more comfort when drilling the holes.
  • The actual drilling and reaming of the holes went well but took a while because of the multiple layers of steel and aluminum.


Inside view of the vertical stab spar to tailwheel mount bolts:

Bolts temporarily in place ... good edge distance everywhere:

I double checked after drilling the pilot holes but did not need any adjustments:

#30 pilot holes done:

My custom F-781 connector plate drilled to the vertical stab:

Drilling in process:

Monday, December 26, 2016

More vertical stabilizer: 6 hours


  • I made a lot of progress getting the vertical stabilizer lined up and mounted but it was slow going.
  • I started out clamping and drilling the aft vertical stab bracket to the fuselage. Unfortunately after drilling and bolting it down I found that the vertical stab angle was slightly off. I made a couple of different sized shims and got it back to perfect again.
  • The plans call for the leading edge of the vertical stab to be offset 1/4" and they have you add a washer to one of the bracket bolts. However the rudder hinge line needs to be perfectly straight and when you add the washer it changes. There was a lot of back and forth because everything is related so moving one thing changes another, etc. 
  • When I got it close to lined up with the offset and hinge line I found that I was not comfortable with the edge distance on the factory f-781 plate . I tried making a shim but the edge distance problems remained. I ended up making a slightly oversized F-781.
  • I'm very happy with the new F-781. Lots of edge distance around the bolt holes and room to work with.
  • I got the new F-781 drilled to the horizontal stabilizer and called it a day.


New F-781 connector plate drilled to horizontal stab:

Bending new to match the old:

Making a shim for the original connector plate:

Drilling vertical stab bracket / elevator stop to fuselage (in retrospect the clamps I used were not strong enough and did not fully compress the various pieces which led to the stab angle changing - not a big deal to fix though):


Saturday, December 24, 2016

Vertical stabilizer progress: 2 hours


  • Clamped vertical stab forward attach plate in place then clamped vertical stab to it and fuselage
  • Aligned vertical stab with horizontal stab and checked alignment with tape measure (many, many times)
  • Clamped vertical stab attachment bracket / elevator stop in place and drilled holes for AN3 bolts. I started with the angle drill through the pilot holes in the bracket then I used the regular drill from the back side to open up and ream the holes final size.


Drilling vertical stab mount / elevator stop:

Getting everything lined up:

Drilling pilot holes in vertical stab mount bracket:

Clamping and measuring alignment:

Looking more like an airplane!

Monday, December 19, 2016

Started vertical stabilizer mounting: 3 hours


  • Before starting to fit the vertical stabilizer I removed the horizontal stabilizer and deburred all the holes on the stab and the fuselage then re-attached the horizontal stab.
  • I made the vertical stabilizer attachment bracket and elevator up travel stop out of a piece of 1/8" angle. The first version turned out undersized so I made another more generously sized.
  • I located the forward attachment bracket and started researching the best way to get everything lined up.
  • While working on this I noticed that the elevator down stop on the quick build fuselage will need to be trimmed significantly to get the correct travel. I sent an email to Van's to verify.
This photo show the vertical stab attach bracket / elevator up stop. Also you can see the over sized elevator down stop under the elevator bearing.

Forward attach bracket and rear attach angle:

First draft of the attach bracket / up stop before trimming:

Sunday, December 18, 2016

Finished horizontal stabilizer mounting: 2 hours


  • I spent a significant amount of time checking that the incidence of the horizontal stabilizer was correct. I did this by using two 3/16" aluminum tubes through the stab's nose ribs tooling holes. This stab is the new one incorporating the service bulletin and on my aft ribs (hs-00005) the tooling holes are not aligned with the chord line. The stab turned out perfectly level using the standard Van's shims - no adjustment required.
  • I carefully located the bottom aft attach holes first and drilled starting with a #30 bit and working up to a 3/16" reamer. I got a nice tight fit for the AN3 bolts.
  • Once the bottom holes were drilled and the stab was temporarily bolted in place I removed the clamps and drilled the upper two holes.

All aft attach holes turned out great:

Another shot looking forward with all holes drilled:

First hole done:

Everything turned out level without adjustments:

Friday, December 9, 2016

Horizontal stabilizer mounting: 10 hours

This work was done over several days:


  • Researched horizontal stabilizer mounting: plans, video and blogs.
  • Did some initial positioning of stabilizer and found that the right aft flange of the hs-00005 rib was interfering with the vertical mounting bar. To fix this I removed the rivets holding the flange to the rear spar and carefully trimmed the flange. I wedged a sacrificial piece of very thin aluminum between the rib and spar to protect the spar.
  • Made the forward 1/8" spacers for the horizontal stab
  • Triple checked and marked center lines on the aft fuselage deck where the stab mounts.
  • Also marked the longeron outline to make sure I could drill with good edge distance
  • Clamped stab in place and checked alignment with wings and fuselage. I used the technique of drilling a hole in the tape measure and using a cleco to secure it - works great for accurate solo measurements.
  • Once everything was triple checked and clamped I drilled through the stab, spacer and longeron. I bolted the left side down, rechecked measurements and drilled the right. I did have to make a spacer for the left side bolt to clear a rivet.
  • I replaced the rivets in the right rib flange and cleaned every thing up.
  • With the stab on saw horses I drilled the inboard mounting holes from the bottom up. I then bolted the stab back on the fuselage and drilled the holes through the fuselage structure with the angle drill using the stab as a guide.


Forward stab mounting holes done:

Ready to drill the inboard holes from the bottom up:

Right bolt hole done:

After trimming rib flange:

Starting to check positioning and alignment:

Spacers made from 1/8" bar:

Dad came over to help me get started on the horizontal stab:

Tuesday, December 6, 2016

Drilled rear spars plus some landing light work: 4 hours

  • Re-leveled fuselage. Reset string and plumb bobs. Triple checked sweep and angle of incidence for left wing
  • Drilled hole for left wing rear spar AN5 bolt. I met the required 5/8" edge distance from the hole center plus a little extra. I started with a 1/8" drill and slowly worked up to an undersized 5/16" reamer that provided a snug fit for the AN5 bolt.
  • After the left wing did the same process for the right wing including checking level, sweep and incidence.
  • Mounted landing lights in brackets and mounted right landing light in wing tip.


Landing light mounted in right wing tip:

Landing / taxi lights mounted in brackets:

Drill bits and reamers for the right rear spar:

 Left rear spar drilled:

Monday, December 5, 2016

Wing alignment and landing lights: 5 hours

  • Made tool to check wing incidence per the plans
  • Right wing incidence was good. Left wing rear spar needed to come up.
  • Adjusting left wing incidence introduced forward sweep.
  • Unfortunately the left wing rear spar did not have any more room for adjustment so the wing had to be pulled out a few inches and the rear spar trimmed.
  • Removed the mechanical stall warner from the left wing - my G3X has angle of attack sensing so the stall warner is not needed. I will mount the outside air temperature probe on the stall warner access panel.
  • Started working on the landing lights. Used the Baja Designs template to cut out the bracket for each light.
  • Prepped and primed landing light brackets
  • Britt and I removed the pins and pulled the left wing out a few inches. I trimmed the spar about 1/16" and we put the wing back in.

The landing lights are fun to work with:

A better shot of the plane in the garage:

Angle with 3" piece to measure wing incidence:

Sunday, December 4, 2016

Level fuselage and check wing sweep: 3.5 hours

  • Used my digital level to level the fuselage in all axes. The stand for the fuselage has adjustable legs. Getting everything right took about an hour.
  • Set up plumb bobs and checked wing sweep. Initial results were a bit of forward sweep on each wing. 
  • The left wing had some room for adjustment and could simply be re-positioned.
  • The right wing was already as far as it would go so I removed the pins and with Britt's help slid the wing out a few inches. Then I trimmed about 1/16" off of the aft spar.
  • I re-leveled the fuselage and wings, adjusted the plumb bobs and everything came out dead on.

All plumb bobs aligned =  no wing sweep!

Getting ready to trim the right aft wing spar:

Right wing had about 1/4" forward sweep:

String and plumb bobs to line everything up:

I used my laser plumb bob to verify alignment with the fuselage:

I'm happy that my QB fuselage has zero twist fore and aft:

Everything leveled:

Thursday, December 1, 2016

More prep and initial wing mounting: 4 hours


  • Finished preparing for wing mounting by removing the ailerons and flaps from the wings.
  • Also organized tools and parts need for wing mounting
  • Britt and I moved the wings from the basement to the garage and put them on pads
  • We started with the left wing and the process went very smoothly. It took maybe 10 minutes to figure out the correct position and dihedral to get the temporary wing pins to go in. We did find the adjustable shop stool to be very handy to support the wing during this process.
  • I measured the fuselage to left wing gap then trimmed the right wing fuel line.
  • The right wing mounting went very quickly


Both wings on - looks more airplane like!


Trimming the right fuel line:

A good bit of grease and the rubber mallet made it easy:

Left wing on!

Right wing in position:

Left wing ready:

The pad made it easy to protect the wing: