Labels

Aileron (31) Avionics (72) Canopy (80) Cowl (28) Electrical (40) Elevators (36) Empennage (94) fiberglass (22) Firewall Forward (58) Flap (43) Fuel System (23) Fuel Tank (4) Fuselage (156) Horizontal Stabilizer (25) Interior (27) Landing gear (10) Paint Schemes (2) Parachute (30) prop (2) Rudder (13) Vertical Stabilizer (14) Wing (133) Wing tip (2) Wiring (18)
Showing posts with label Elevators. Show all posts

Thursday, May 6, 2021

Empennage work:


Elevators are balanced and "permanently" installed. I balanced both elevators separately then connected them and the push pull tube and torqued all bolts.

The elevator trim servo can be unplugged here to remove the elevators when the plane is painted.

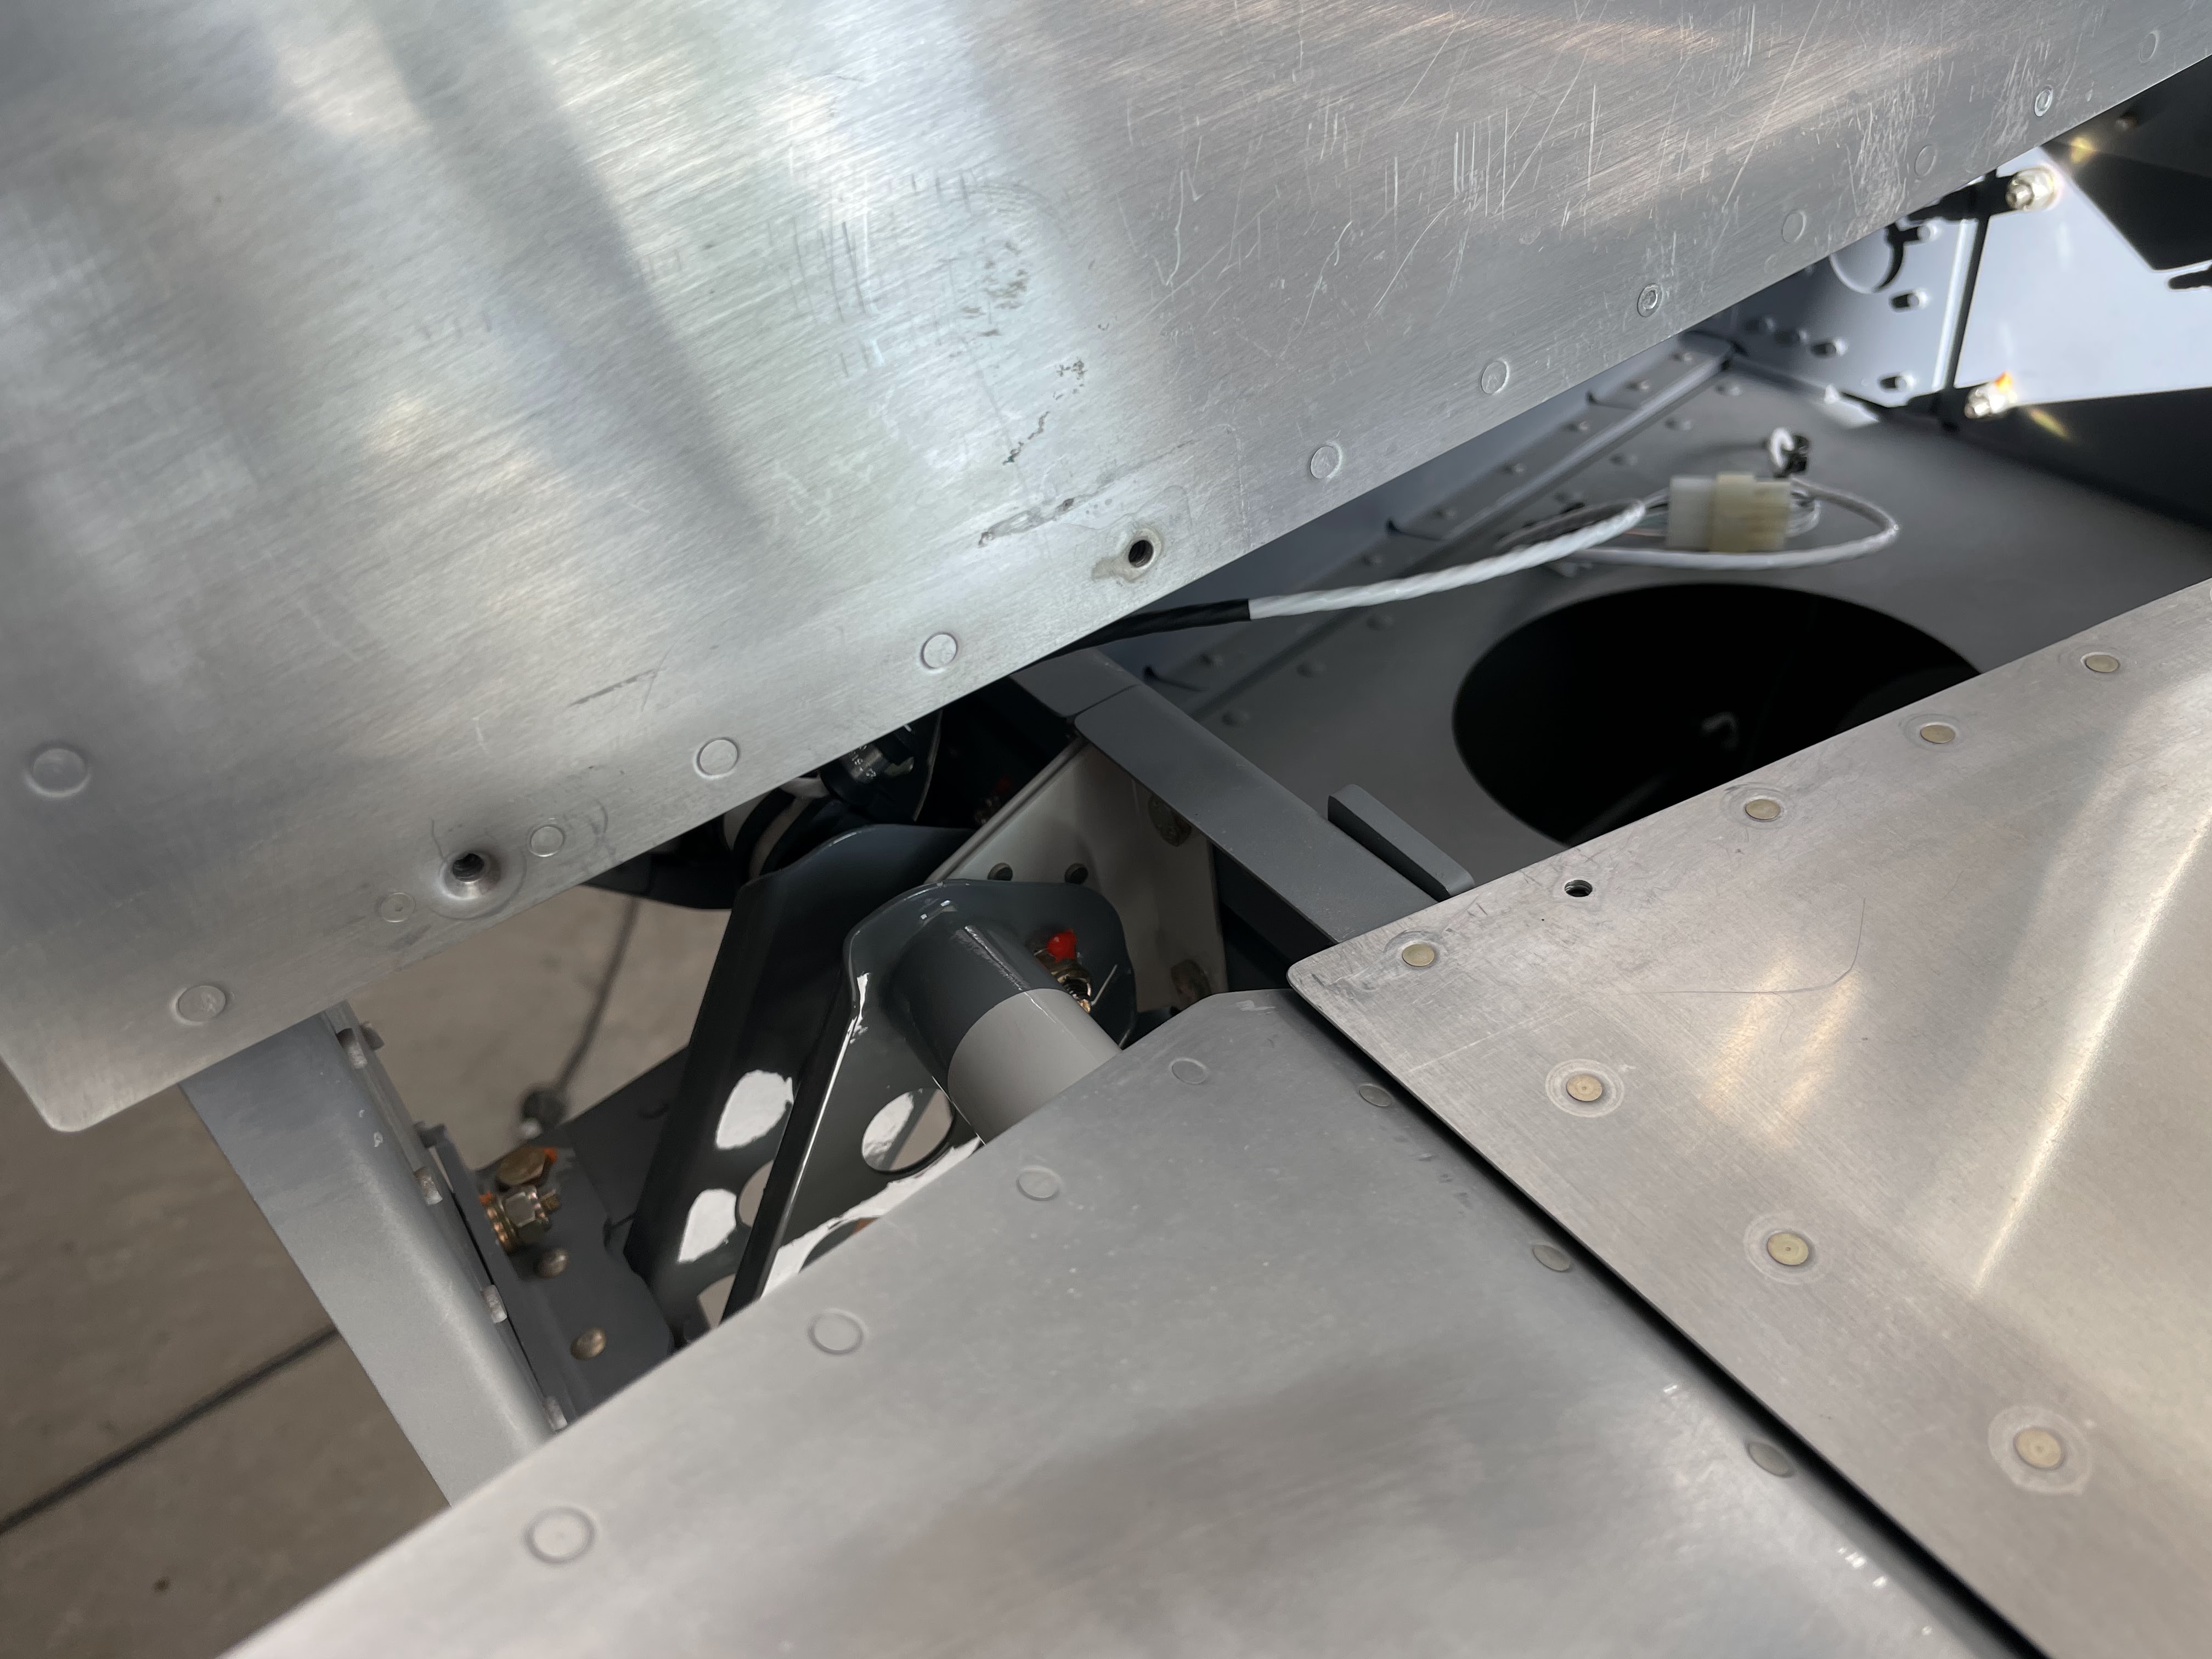
I copied the elevator trim servo wiring idea from a Vans Airforce forum post. The wire remains clear through the full travel of the elevator:

Right elevator only needed a little extra weight to balance. After painting I can easily add more.

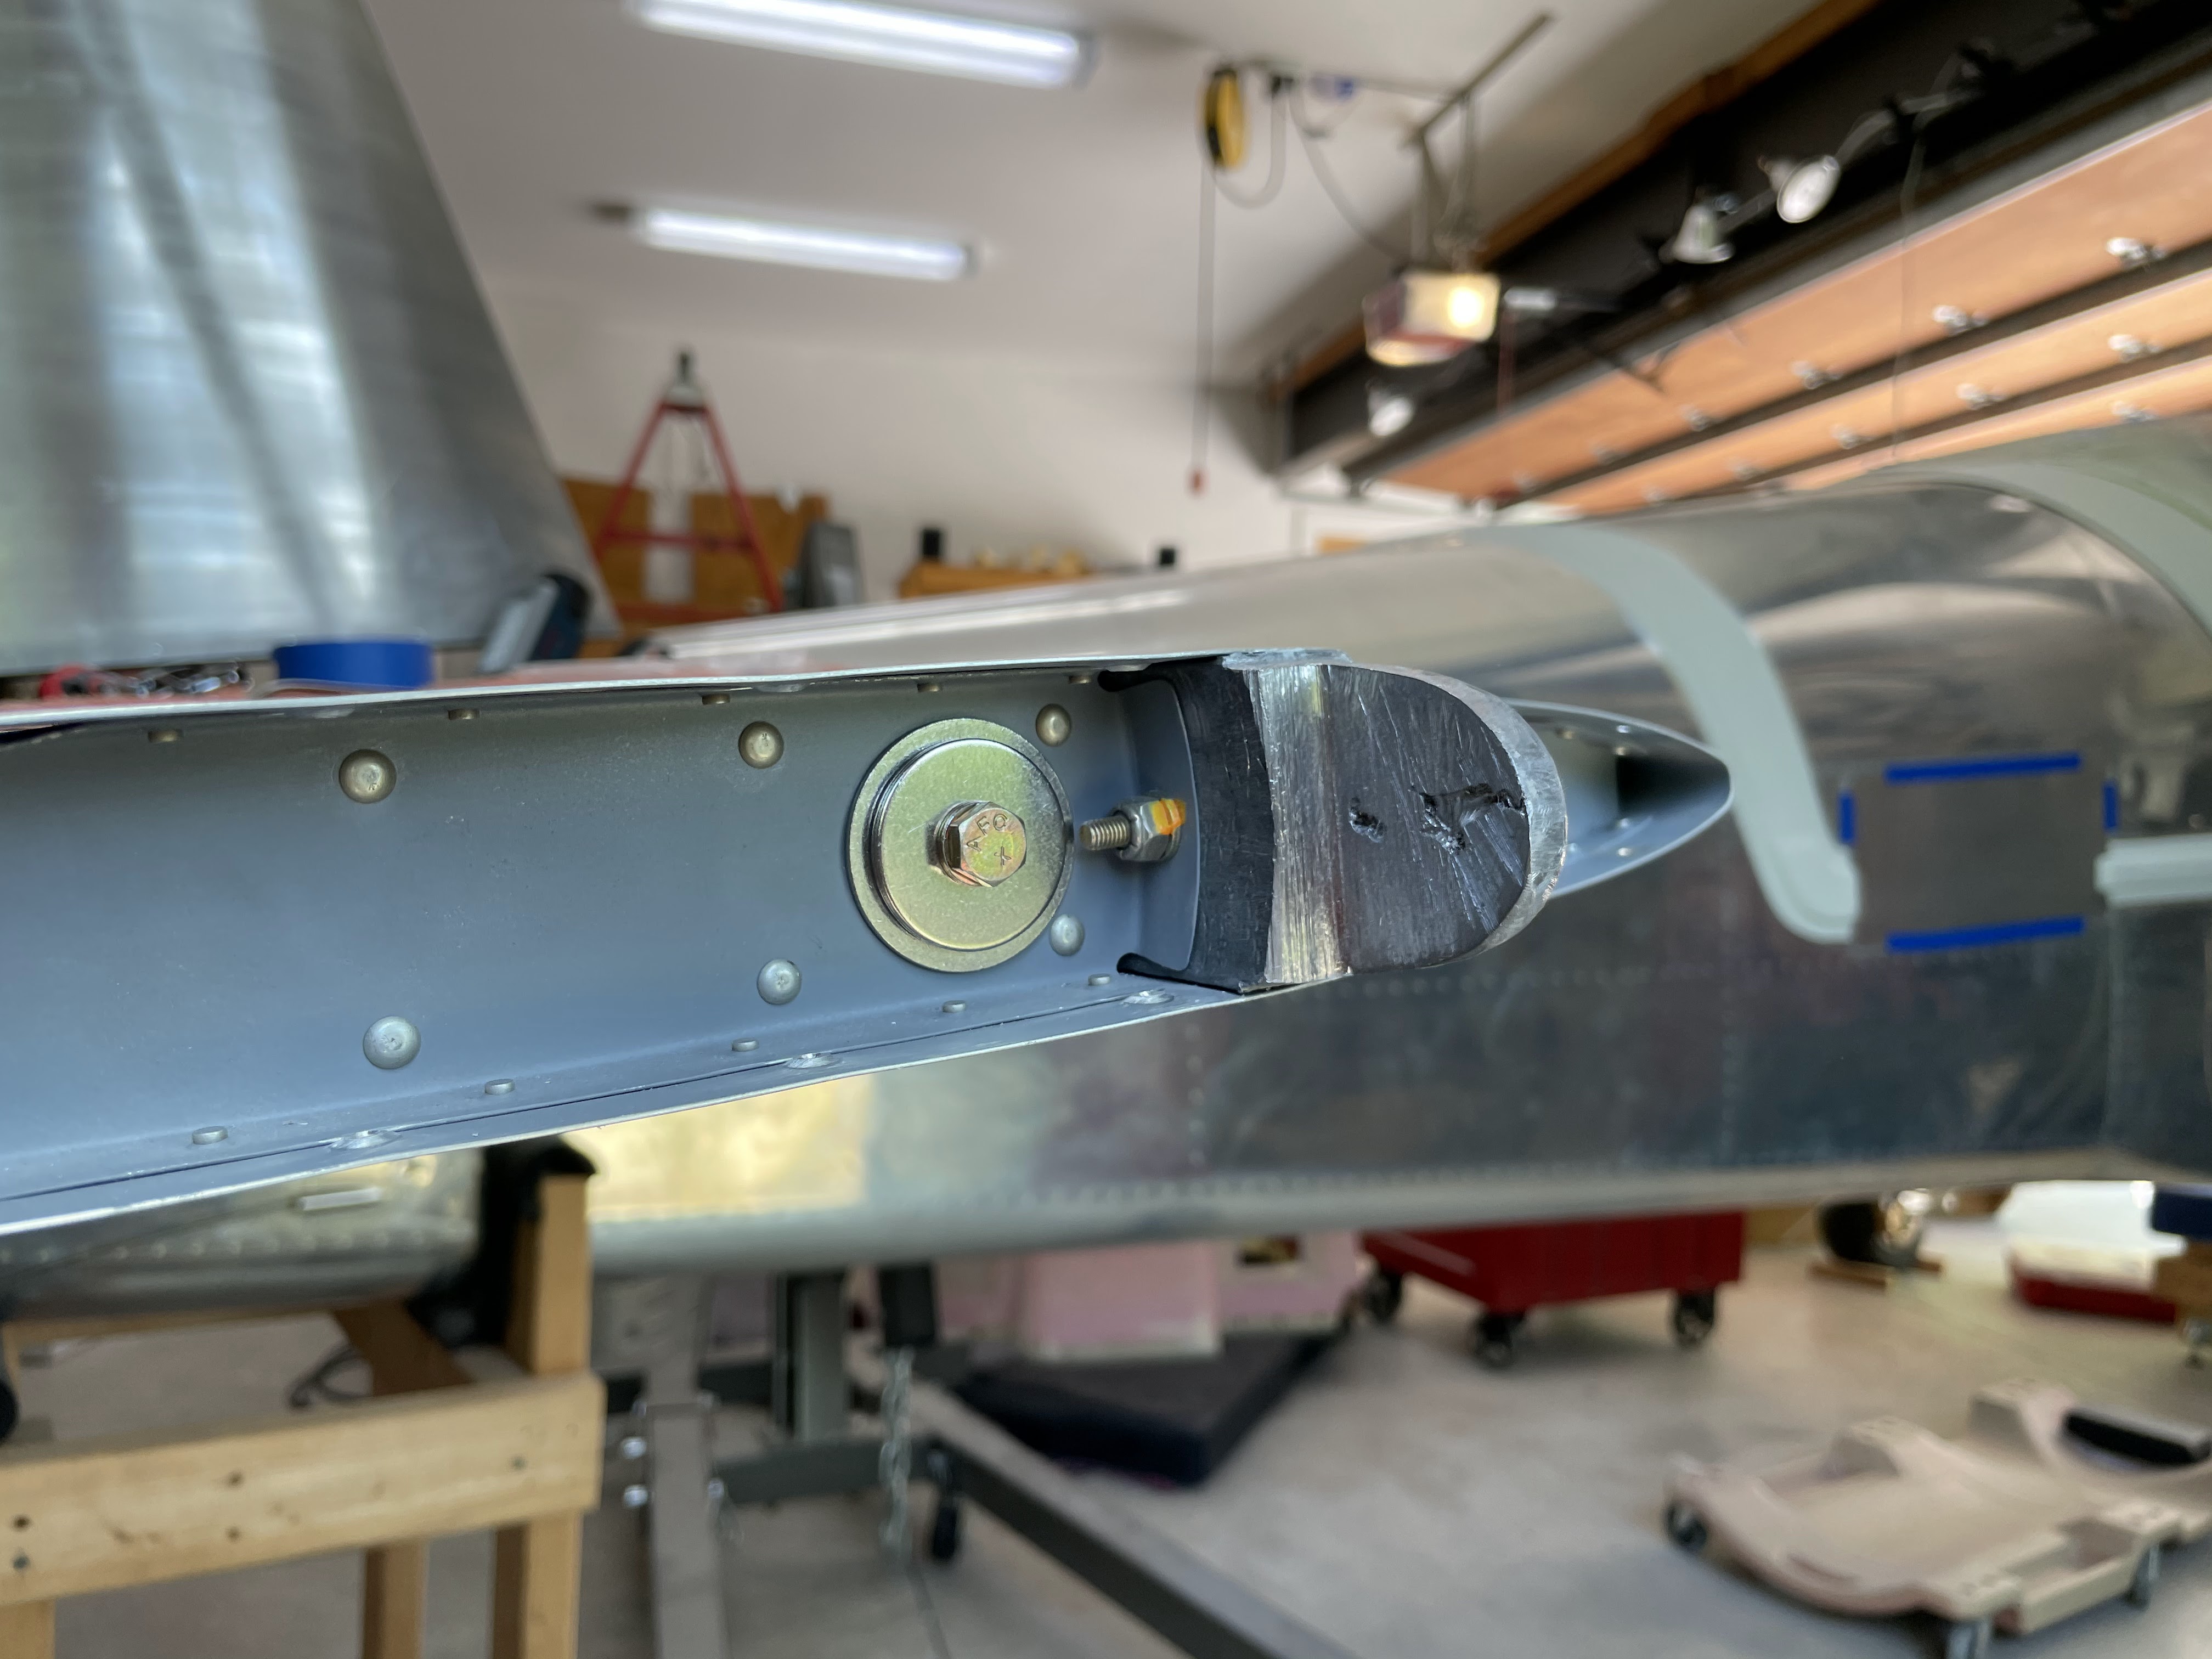
Much more weight required for the left elevator to compensate for the trim servo.

Making the trim servo plug. There is also another plug attached to the trim servo so it can be removed for maintenance without removing the elevator.

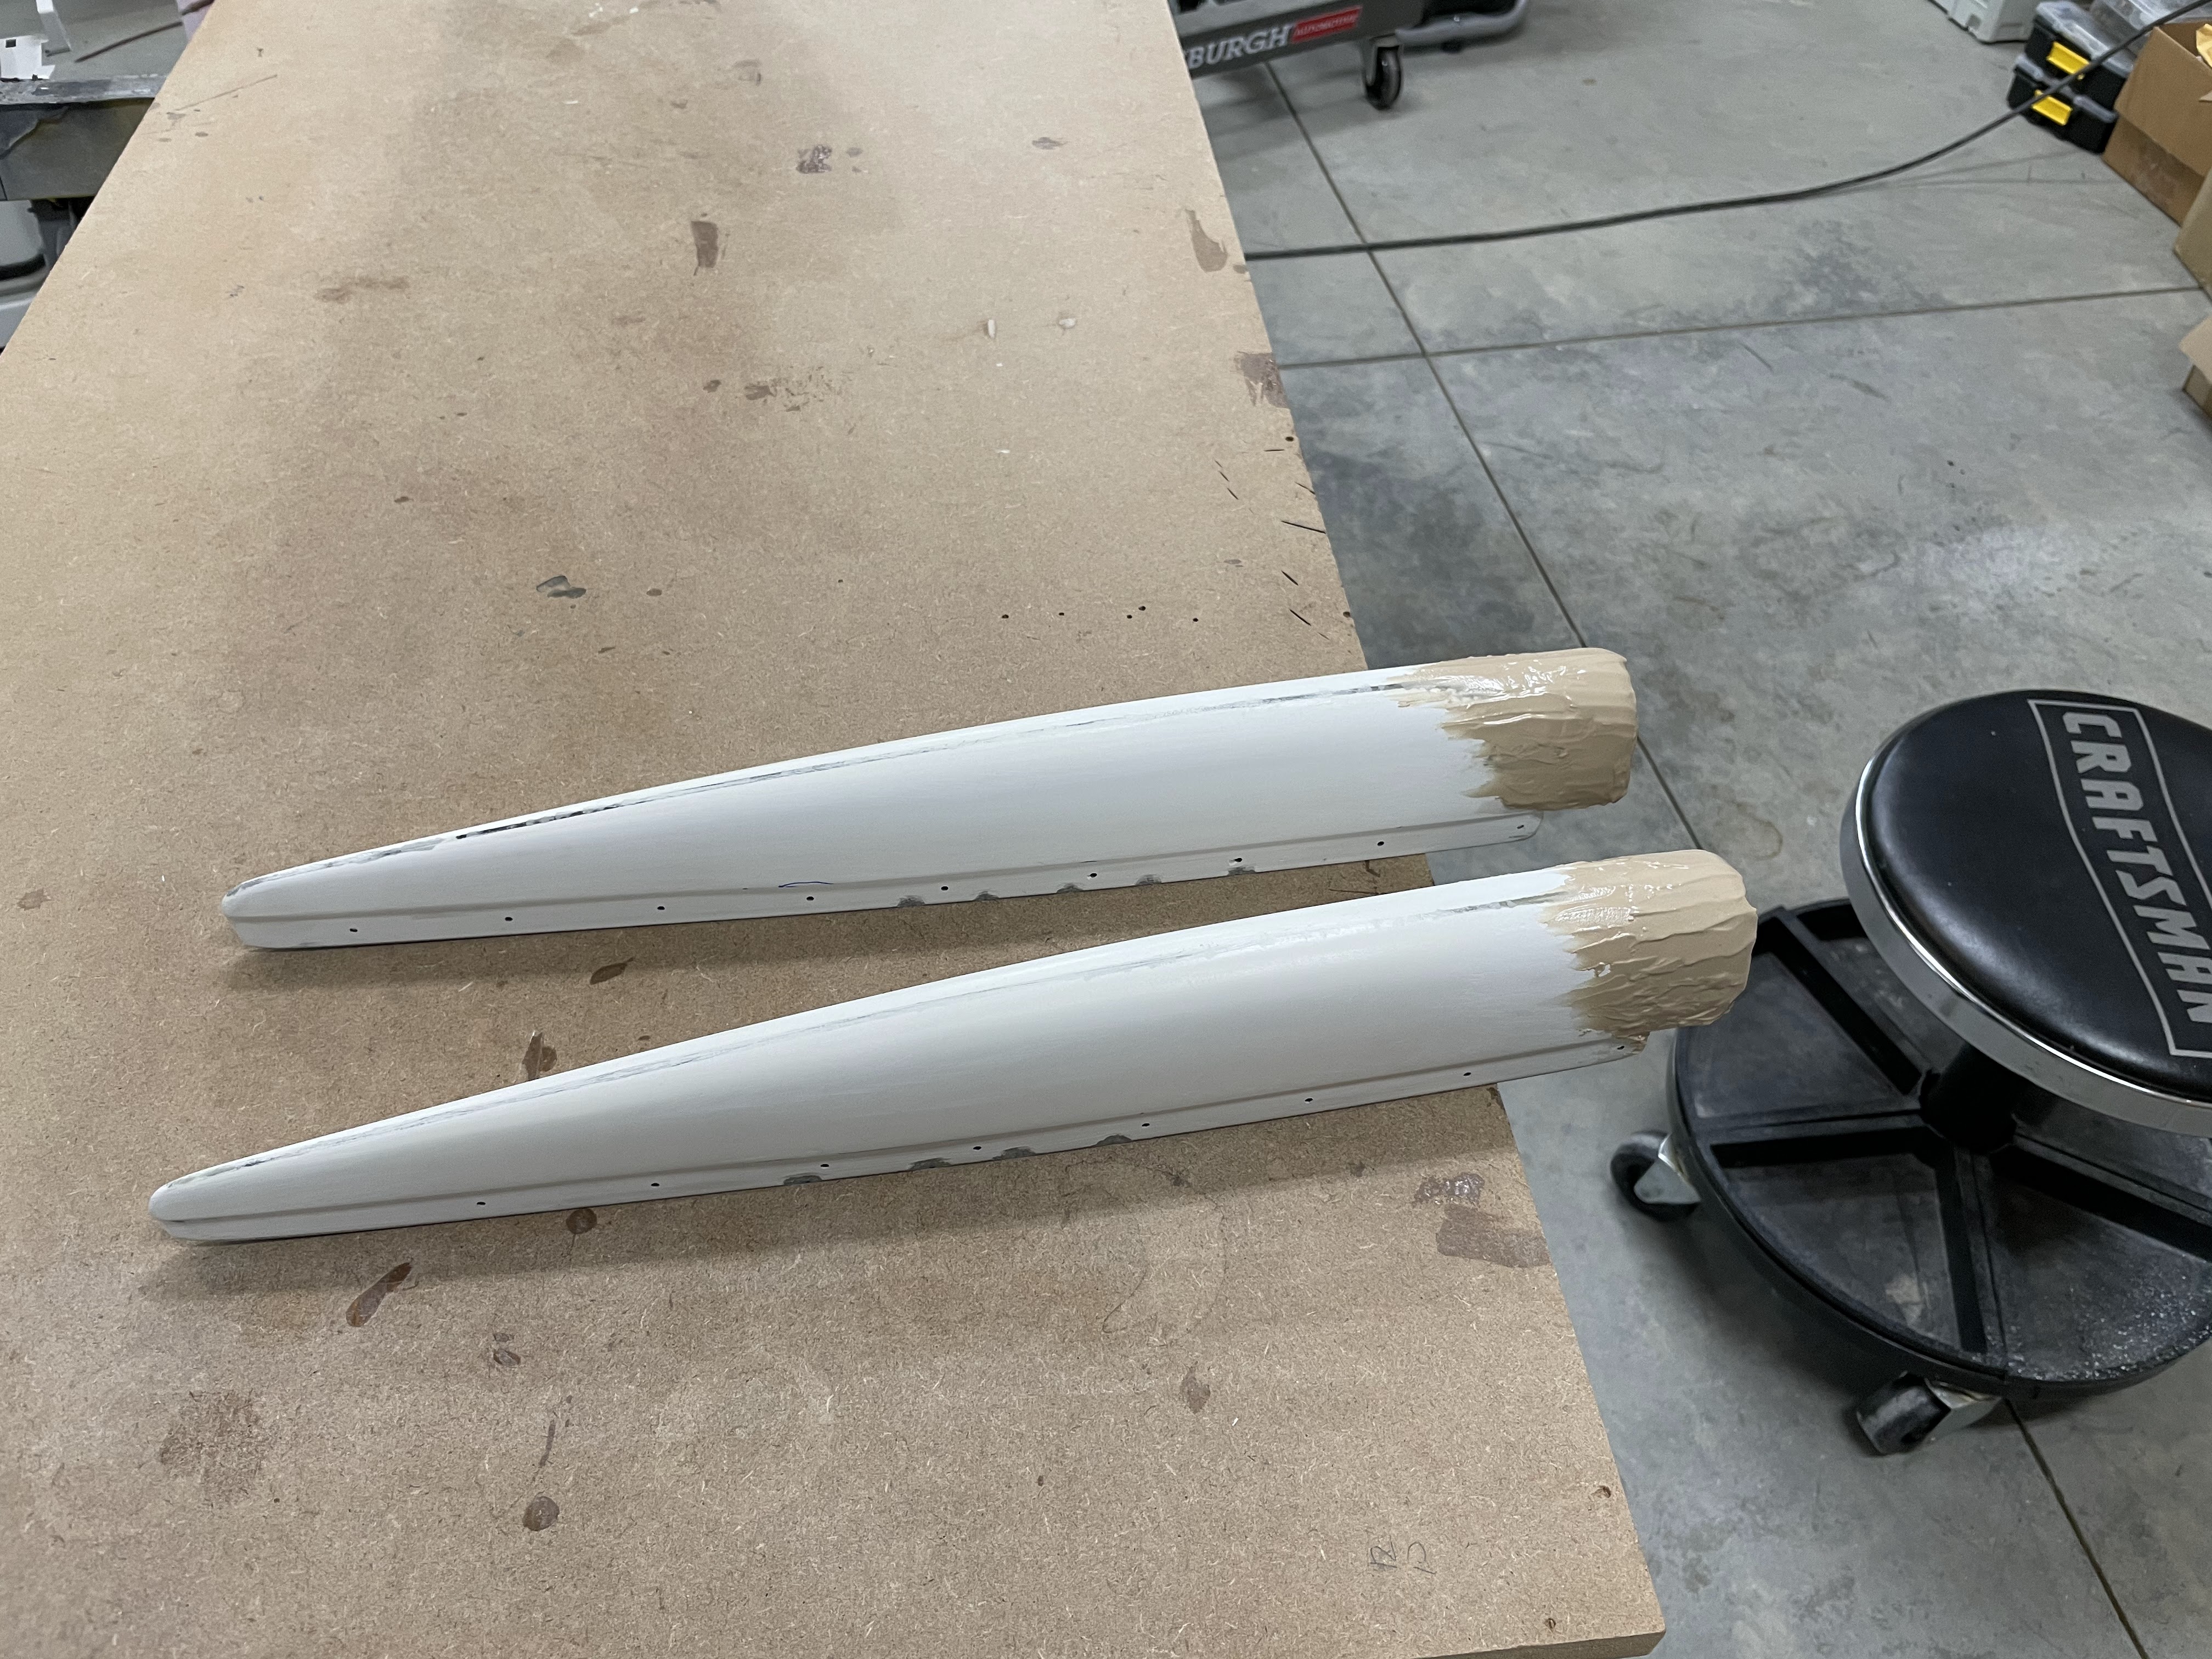
Elevator tips after some epoxy primer:

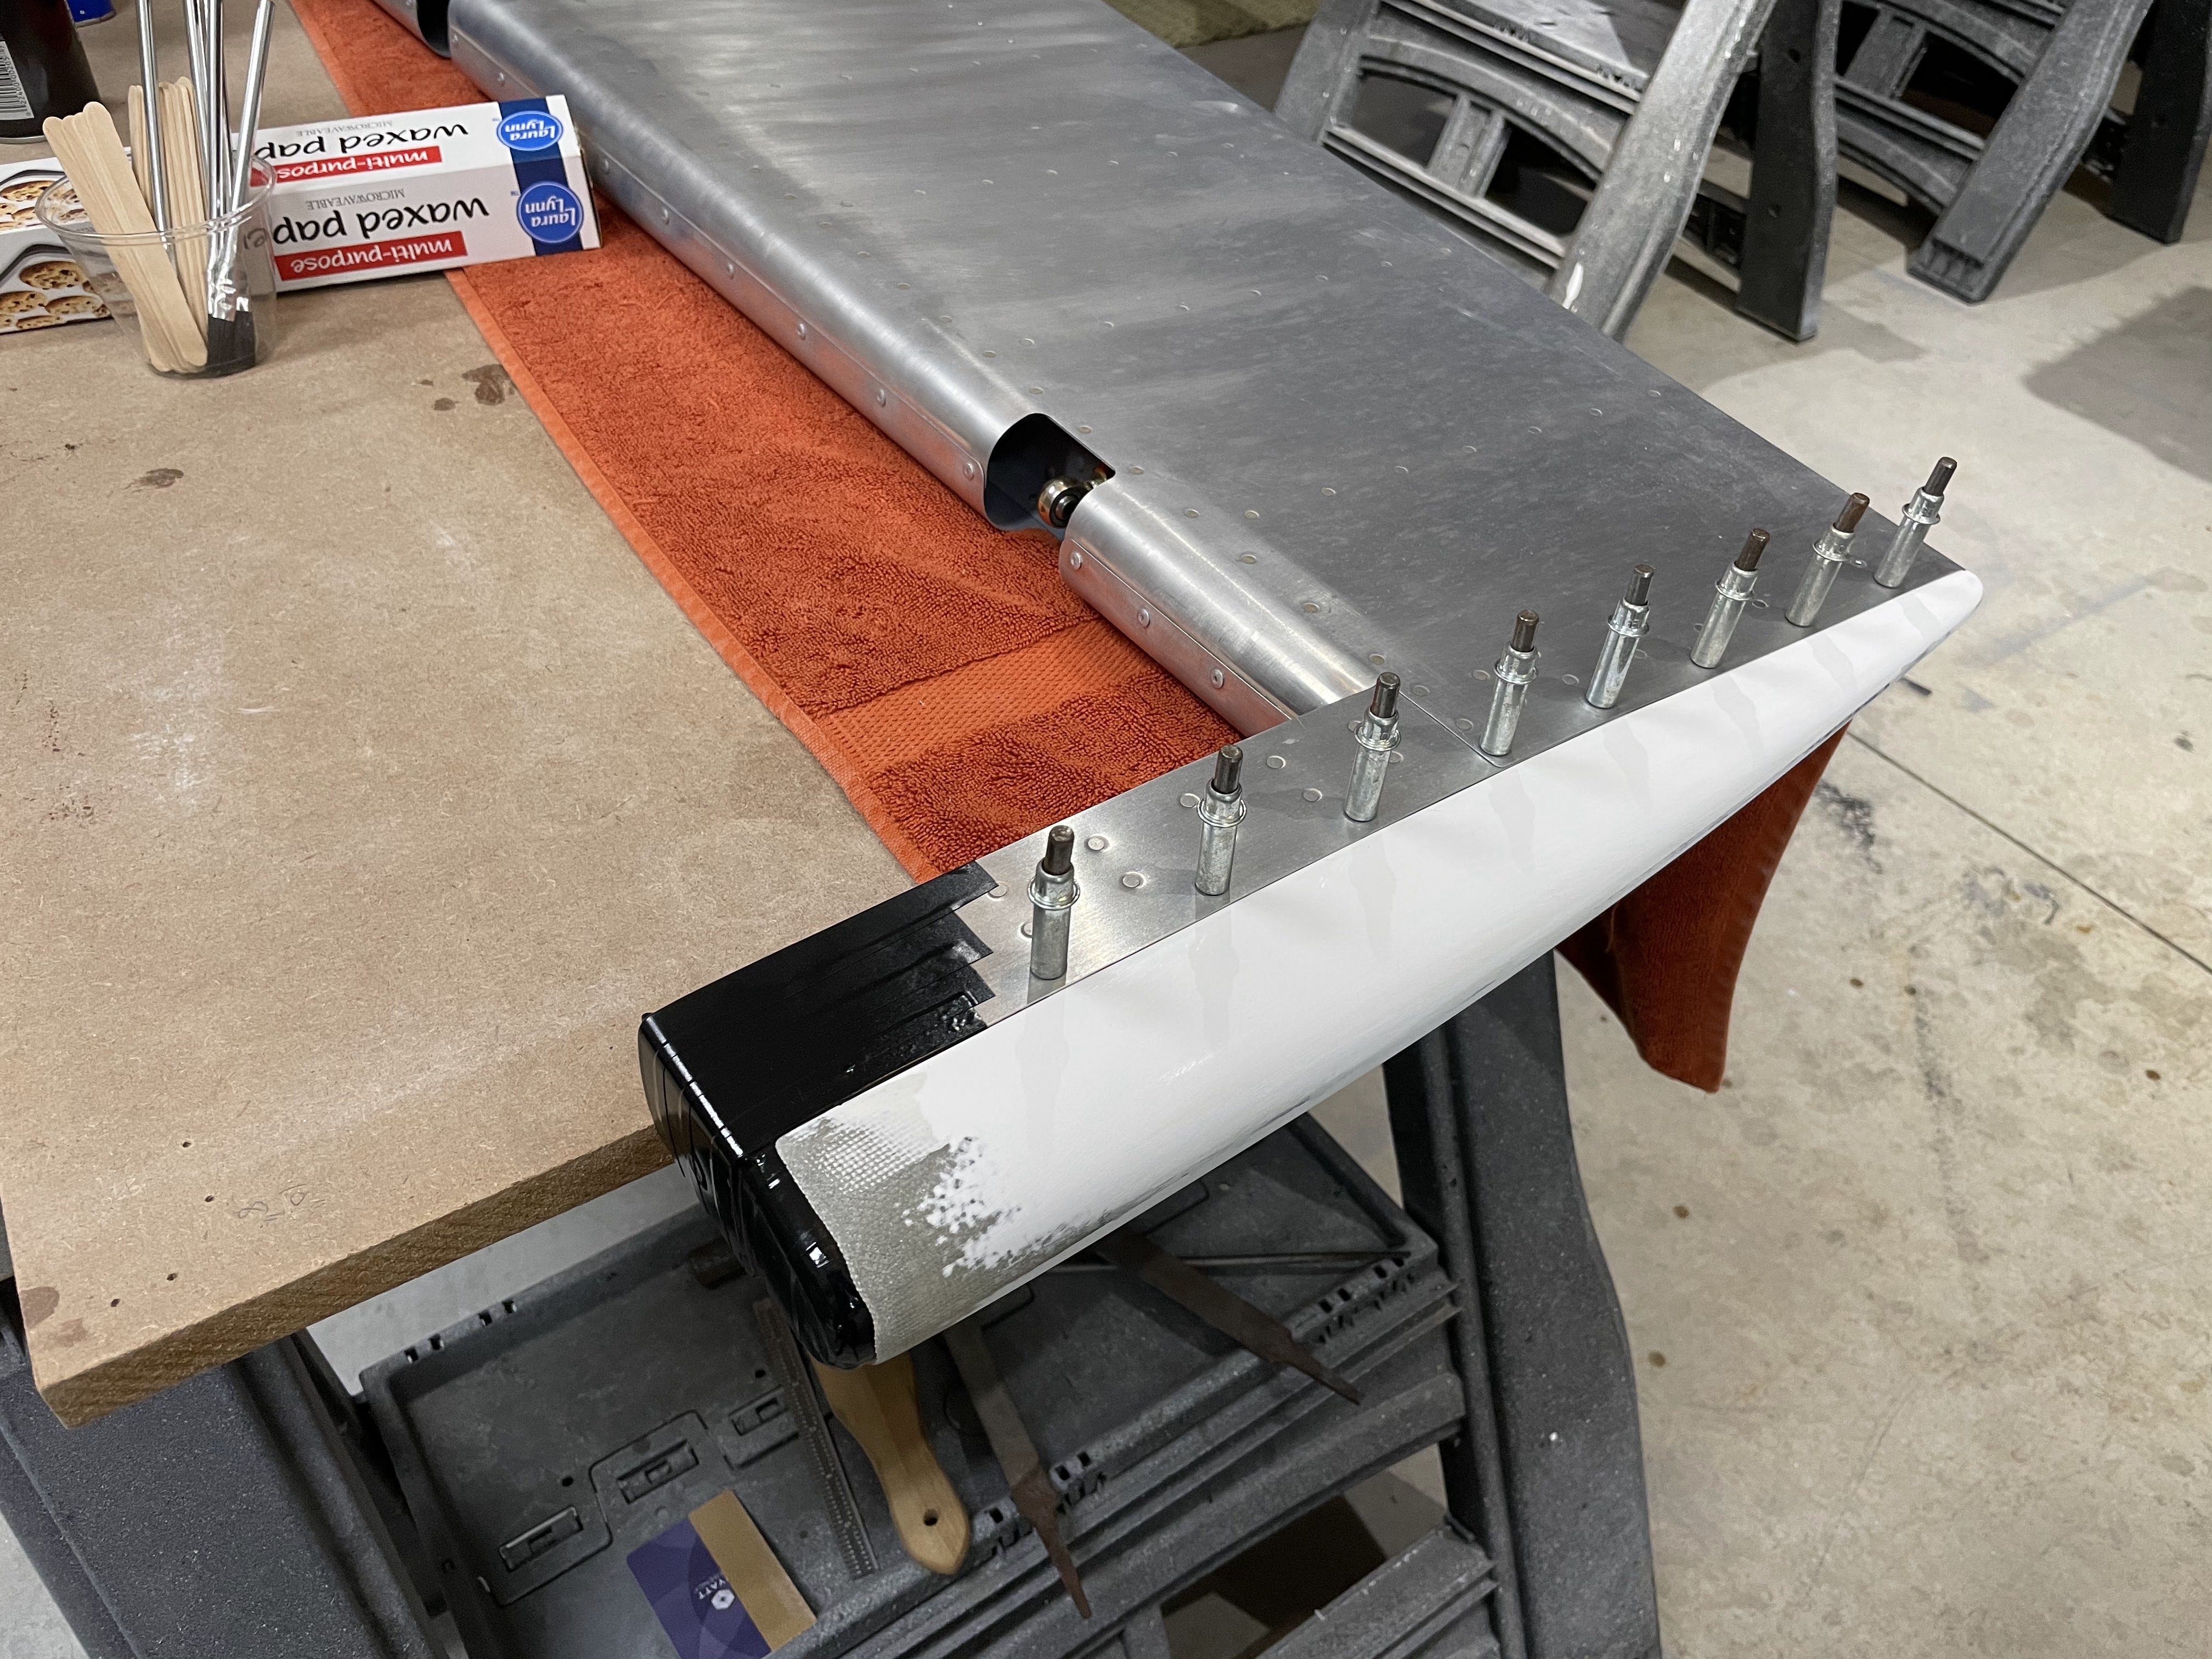
Horizontal stabilizer drilled for tips:

I cleaned up and painted the elevator horns:

I used soft rivets and attached the plate nuts directly to the fiberglass elevator tips:

A lot of filling and sanding:

Saturday, April 17, 2021

Windscreen fairing complete! also more work on elevator tips:

Victory shot with the newly attached windscreen fairing:

Very happy with the fit.

The fiberglass turned out great but the paint shop will take it to the final finish.

My brother Paul was instrumental in getting the windscreen fairing attached. We used Sikaflex 295 UV. This is the same product I have used to attach the windscreen, canopy and canopy fairing. The prior experiences definitely made a difference on the canopy fairing. It was still very messy and a lot of work. (The little black pouches around the fairing in the photo are one pound weights from a training vest.)

Here we have applied the Sika primer. You can also see all the precision taping. We used two layers of electrical tape and peeled one off after the primer had dried.

Fairing after first coat of epoxy primer. This revealed a number of pinholes that I went over with Metal Glaze followed by more sanding and another coat of primer.

After a layer of West epoxy using the fast hardener.

Elevator tips after initial coat of West micro:

Sanding the Rage ultra and metal glaze:

It was easier to apply this layer of filler with the fairing in place.

Final fiberglass to close out the elevator tip:


Thursday, April 1, 2021

General Update: Baffles, primed canopy fairing, windscreen fairing, elevator tips and more exciting stuff!


Trimmed right elevator counterweight to balance. The elevators are balanced separately but the left has the trim servo in it so it's much heavier.

Left elevator tip ready for fiberglass to close off the end:

Fiberglass in place:

Drilling left elevator tip:

Windscreen fairing after a lot of sanding of first layer of filler

Thick layer of west microlight fairing filler:

Fairing has been sanded but not filled. Black area is one layer of embedded carbon fiber.

Reinforcing with a bit more fiberglass cloth:

Sanding progress:

Rough trim complete:

Layup done. Four layers of glass plus one layer of carbon fiber over the roll bar area. The short pieces are peel ply for the initial finish.

Ready to start the long process:

Windscreen almost ready for fiberglass. The white strip over the roll bar the the printed area around the front is double sided tape meant to create space for the sika flex adhesive.


Second coat of epoxy primer on canopy fairing turned out great:

First coat of primer revealed a fair number of pinholes which I filled with metal glaze:

First coat complete:

I thought it was ready but there were still a lot of lurking pinholes:

The cowling is so complicated. Still in process. Filling and sanding.

Baffles are complete:


Britt's belt hole punch worked great to prep the baffle material for rivets:


Wednesday, January 31, 2018

More elevator controls and BRS parachute rack!: 6 hours

The following work was done over two days:

  • I spent about an hour getting the washers and the rod end bearing for the forward push pull tube into the forward control column. Very frustrating but worked out well. Dental floss and tape helped me finally get everything together!
  • Permanently bolted the aft push pull tube and the servo to the bell crank.
  • Cleaned up angles and canister for the BRS parachute system.
  • Installed the angles for the BRS canister and put the canister in place. The canister will not get bolted in until the actual parachute and rocket is installed - hopefully this summer!
  • Installed the aft tunnel cover and connected the flap position sensor. I also had to do a slight reroute on the flap wiring to clear the cover.
  • Installed the roll linkage for the two control sticks. This took a while to get everything lined up. This also included the tabs and springs for the roll trim system.


Stick linkage for roll - the tab is for the roll trim:

Sticks are linked up in roll:

Flap position sensor done:

Parachute canister ready for loading:


Aft push pull tube and pitch servo complete:

The washers for the control column and the forward push pull tube have been the hardest to work with so far: