Labels

Aileron (31) Avionics (72) Canopy (80) Cowl (28) Electrical (40) Elevators (36) Empennage (94) fiberglass (22) Firewall Forward (58) Flap (43) Fuel System (23) Fuel Tank (4) Fuselage (156) Horizontal Stabilizer (25) Interior (27) Landing gear (10) Paint Schemes (2) Parachute (30) prop (2) Rudder (13) Vertical Stabilizer (14) Wing (133) Wing tip (2) Wiring (18)
Showing posts with label Landing gear. Show all posts

Friday, January 10, 2020

Intersection fairings (wheel pant to gear leg) and engine heat power plug:

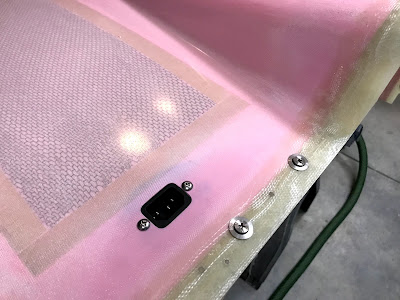
Power plug with backing plate for Reiff engine sump heaters. Plug is standard computer power supply plug and can be easily replaced. Backing plate will get attached with g-flex epoxy.

Plug location under cowl is easy to access and low profile:

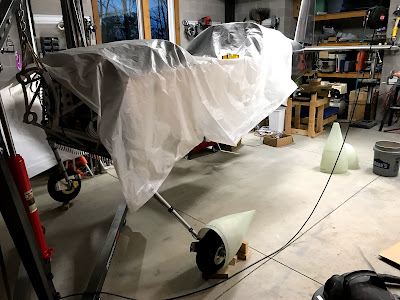
Left wheel pant / intersection fairing combo after being cut off / removed from the landing gear:

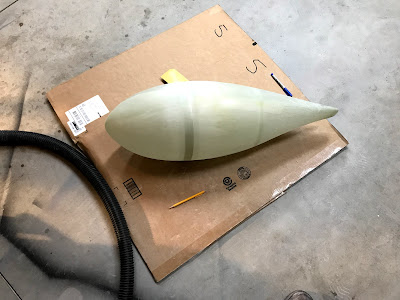
Right wheel pant after fiberglass layup. (I'm happy with the expanding foam but it was definitely a learning experience. The foam is extremely easy to shape but I think the main trick is to get consistent coverage when the foam is expanding.)

Some of the foam turned out a little lumpy but it still seems to beat the other methods. Next time I would consider using a more dense foam such as 4lb.

I used a 3 layers of fiberglass for the top of the intersection fairing. These were wetted out in a stack. I used tape for the underside but I did cut off all the seams.

Right fairing after shaping:


Next time I would spend a little more time building a more accurate "dam" for the foam. I would also plan on pouring the foam in two mixes to cover the top of the gear leg better. This was about 320 grams of foam.


Checking the fiberglass dry on the left side. My fiberglass skills still need work. The glass looked good on the top but when applied it did not want to turn the corner and stick to the underside. 


The foam carves down very fast with a hacksaw blade.


Tuesday, May 8, 2018

Right wheel work and spinner back plate

Spinner back plate doubler (L) and spinner back plate after initial cut out:

I traced the doubler then drilled the spinner back plate: 

Using the doubler as a pattern for cutting out the back plate to clear the prop hub:

Right landing gear ready with all bolts torqued:

Raising the fuselage to remove the right wheel:

Wheel pant plate nuts installed:

Friday, April 20, 2018

Hung engine! and misc: many hours!

The following work was done over many days:

  • Built tail wheel lift - worked great to easily level the tail when hanging the engine.
  • My brother Paul came to town to help get the engine hung
    • The first big step was getting the engine out of its box. The original plan was to lift it out but the base of the lift I have was not wide enough so we had to cut the engine out of the foam it was encased in. 
    • Once we had the engine free we removed the mags and installed the mag block off plates from EFII. These plates also serve as mounts for the ignition coils.
    • We also installed the prop governor, prop control bracket and oil temperature sensor.
    • The actual hanging of the engine went quickly. We used the tips from Vans Air Force. With the tail level we got the bolts in easily.
    • We ran into problems trying to tighten the nuts on the engine bolts. My wrench was to big to fit in the tight spaces and hold the nut. The eventual solution involved a lot of grinding down on the wrench. On the lower bolts I would also recommend putting 2 washers on first as this also makes the nut easy to access.
  • While Paul was in town we also transported the wings and wing stands to the t-hangar at AVL.
  • Torqued the engine bolts using new nuts. Also installed the cotter pins (tricky).
  • Removed the top spark plugs and installed the auto plug adapters and dehydrator plugs.
  • Installed a pipe plug in the gauge port on the fuel spider.
  • Installed a steel fitting on the #3 cylinder to attach a line for the manifold pressure sensor.
  • Removed the stock Lycoming breather fitting. I have a new straight fitting that will work with the half Raven inverted oil separator. (In retrospect we should have done this before hanging the engine. Space was very tight. The fitting came off but I will need some touch up paint for the engine case!)
  • Installed JDAir ball bearing tail wheel assembly. I'm really impressed with this product. I think it will be low maintenance. It also looks very nice with the black powder coat. The fit was very precise with my tail wheel spring. I just had to open up the holes for the taper pins.


A little closer to flying...

A lot of great help from my brother:

Tail wheel lift works great (took a lot of time to build):

Magneto block off / coil mount plate:

Engine ready to be hung:

Manifold pressure fitting (with orange torque seal):

Spider gauge port plug (with orange torque seal):

Dehydrator plugs:


JD Air tail wheel assembly:


Tuesday, March 27, 2018

Right wheel pant drilled and reinforced: 3 hours


  • Drilled both halves of the wheel pant to the inboard mounting bracket
  • Reinforced screw and rivet holes on the wheel pant with 3 layers of fiberglass tape


Ready to apply epoxy and fiberglass:

Right wheel pant drilled to brackets:


Sunday, March 25, 2018

Misc. left wheel work, started on right wheel pant: 6 hours

This work was done over several days:
  • Sanded left wheel pant fiberglass reinforcements
  • Drilled left wheel pant mounting holes to final size and installed nut plates on wheel pant bracket
  • Installed all left disk brake components and torqued all bolts and brake line fitting. I also installed the cotter pin in the axle nut.
  • Riveted outboard bracket to left wheel pant. I also put some CA glue on the rivets to help lock them in.
  • Started sanding and trimming on right wheel pant
  • Followed the same steps as the left and got the aft wheel pant drilled to the outboard bracket


Aft right wheel pant attached to outboard bracket:

Finding the center (approximate!) of the right wheel pant:

Left wheel pant bracket riveted in place:

Finished with left wheel assembly:

Wednesday, March 14, 2018

Left wheel pant: 7 hours


This work was done over several days:
  • Sanded and trimmed left wheel pant - for several hours
  • Used the shop crane to raise the plane and get the weight off of the gear
  • Used plumb bobs and my 6' level to create a reference for the wheel pant
  • Getting wheel pant lined up required a good bit of bending on the metal brackets that it mounts to
  • Used a laser to help mark wheel pant center line
  • Drilled aft section of wheel pant to outboard bracket then put front wheel pant section on and got measurements off of reference line
  • Drilled all wheel pant mounts
  • Reinforced all mounting locations on wheel pants with 3 layers of fiberglass and clecoed wheel pant to mounts


Wheel pant reinforcement curing:

Reinforcements in place:

Wheel pant drilled in place

Lining up aft wheel pant:

Slowly trimming / fitting wheel pant:


Initial sanding done:

Saturday, March 10, 2018

Worked on brakes: 3 hours


  • Worked on fitting brakes. I found that the left brake pins were binding so I used the shop crane to lift the plane and remove the wheel. I was able to eliminate the binding by flipping the orientation of the brake mounting plate - easy fix.
  • Installed the AN elbow fittings in the brake calipers
  • Ran the Bonaco brake lines and secured with self fusing tape and several adel clamps. I used my adel clamp pliers and I'm impressed with how well they work. They are going to be very handy after we hang the engine.


Brake lines permanently installed:

Calipers and wheel will get fully installed after wheel pants are fitted:

Adel clamp pliers work great:

Friday, March 9, 2018

Main landing gear installed: 3 hours


  • Bled and tested my harbor freight shop crane
  • Used some old climbing slings through the engine mount to hoist the fuselage. 
  • Installed landing gear legs and found that the left side was contacting the fuselage skin and the right was a little to close. I marked the spots that needed to be trimmed, removed the landing gear and used the trusty dremel to trim the fuselage skin.
  • Re-installed the landing gear and torqued bolts. Hopefully gear is now on permanently.


The plane looks bigger on the gear!

Harbor Freight shop crane worked great:

I was a little nervous about having the fuselage in the air:

Wednesday, March 7, 2018

Landing gear prep, tail wheel install: 6 hours


  • Trimmed both inboard wheel pant mounts to clear Matco calipers
  • Cleaned up wheel pant mounts
  • Installed right brake caliper mount and wheel pant mount on gear leg.
  • Installed tail wheel yoke on tail spring. Taper pins work great!
  • Greased and installed Screaming Eagle tail wheel fork and steering arm with tie down ring.
  • Also installed my light weight tail wheel.
  • Readied left gear leg and wheel assembly for install including drilling the axle for the cotter pin and all the same steps as the right gear  (this one went a bit faster then the right!).


Left gear leg with caliper mount and wheel pant mount:

Cotter pin hole drilled in left axle:

Tail wheel installed: