Labels

Thursday, December 20, 2018

Cowling work with a bit of instrument panel and BRS fairing

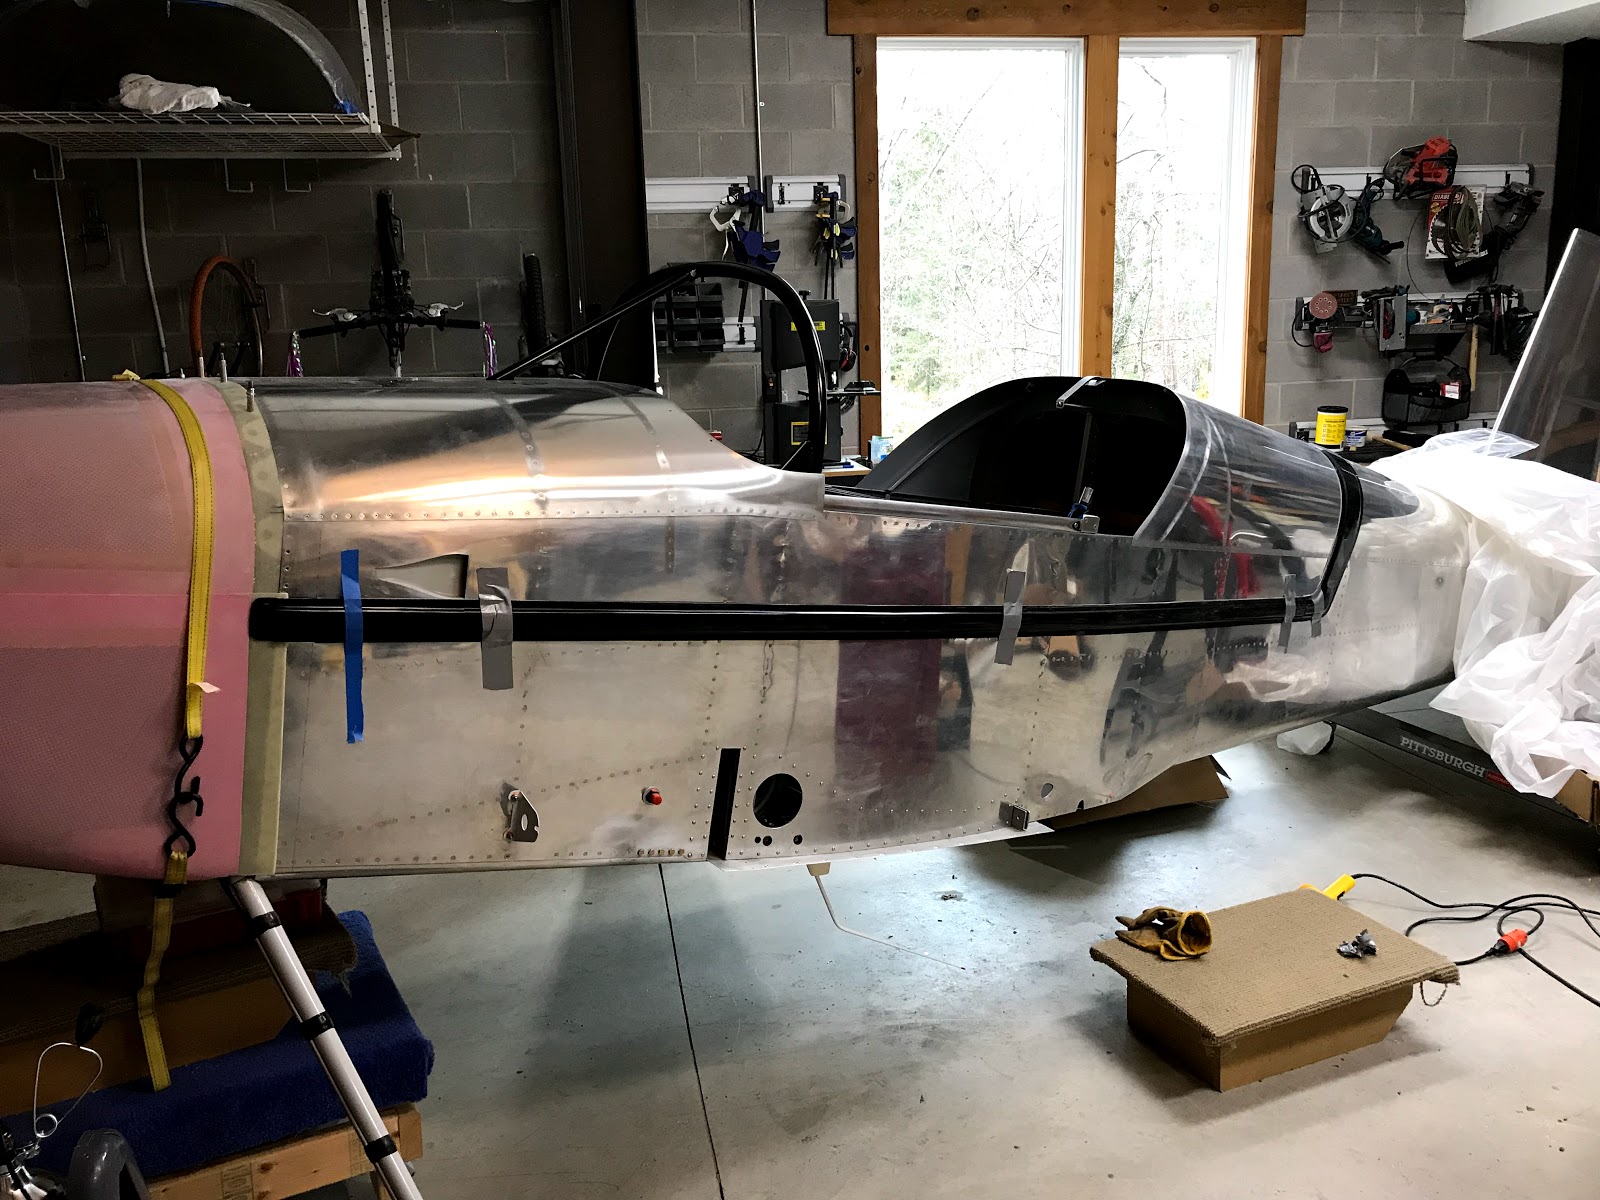
After numerous rounds of fitting, removing the cowl, trimming and sanding I have the initial bottom cowl fitting done. I believe that everything is where I want it to start installing the Skybolt fasteners and prepare for a lot of fiberglass finishing work.

I took some time to experiment with a couple of coats of the Rage Xtreme body filler on my parachute harness fairing. I'm very happy with it so far. Very easy to work with and great results! I plan on using it on all the fiberglass.

Nice to have the garage open to work! 
  
For a diversion from the cowl I spent some time and got the placard / access panel done on the instrument panel:

I needed the placard and this extra access will make it easier to do hook everything up!

I carefully cut the hole with the Dremel after drilling the corners with a step bit:


One advantage of doing the panel with a CAD program is being able to print out a template to keep everything lined up:

Saturday, December 15, 2018

All Skybolt firewall flanges in place


All firewall flanges are attached:


Drilling spacer strips (The bottom cowl extension is very thick so I opted to double the .025 spacer strips):


Sunday, December 2, 2018

Cowling fastener work

I mocked up the fairings and flanges to figure out the spacing for the skybolt fasteners that would work with the parachute harness fairing. I used 3" spacing for the fastener above the parachute fairing and then the standard 3.5" spacing for the 4 flanges below.

Mocking up the flanges for the left side. (Both skybolt flanges on either side of the fairing had to be cut down for the fairing to fit.)

Left side skybolt flanges riveted on:

Mocking up the right side flanges. (This side went very quickly.)

Right side flanges riveted on:

Sunday, November 25, 2018

Upper cowl skybolt progress and BRS fairing sanding

Most of the Skybolt fasteners are installed for the upper cowl. (I'm going to wait for the final 3 on each side until I fit the lower cowl.)

The Skybolt fasteners look good. I still have to do some adjusting for the final fit.

I used the o-ring method to hold everything in place until after final paint when I will put on the metal retainers.

I was able to rivet everything fairly easily other than the area around the brake reservoir.

This photo does not show it well but a small led light under the cowling made it easy to see where to drill the holes.

The BRS fairing is ready for a coat of filler (RAGE ... XTREME!!):


Friday, November 23, 2018

BRS fairing modification and some cowl work

Fairing with first layer of epoxy and micro balloons. (I plan on sanding most of this off then trying the Rage Xtreme filler for the final coat. I also plan on using the Rage on the cowl for pin hole filling.)

I used 3 layers of fiberglass tape for the layup:

While the layup was curing I put in one of the skybolt cowl fasteners:

Initial curing. Top layer is peel ply.

Layup ready for peel ply:

Ready for lay up. (Before I put the fairing on I waxed all of the harness and spacer tape.)

Harness taped in place with cardboard spacer.

Wednesday, November 14, 2018

BRS parachute fairing work:


  • I decided to work on the parachute harness fairings because the harness passes through the edge of the cowling and affect where some of the cowling fasteners are located.
  • One challenge was the thickness and routing of the rear parachute harness. I could not get the fairing to fit over it and fit correctly. I emailed BRS and an engineer actually called me within and hour and suggested some solutions. Very nice customer service!


Mocking up left side fairings:

The harness that runs under the right side of this fairing is the problem. It's very thick. I'm in the process of sanding the inside of the fairing for more space. I'm also using a heat gun on the fairing to help the fit.

I marked off where the fairing goes in relation to the cowl so I can plan the skybolt tabs:

This is the problem harness. I have since moved it behind the bolt head and the fit is getting closer.

Monday, November 12, 2018

Cowl progress

  • As of today the top cowl position has been "locked in". After much sanding and leveling etc. I drilled holes for temporary clecos to keep it from moving. 
  • I also was able to trim the lower cowl to fit around the landing gear and get the lower cowl temporarily in place.
  • On the bottom cowl I spent a fair amount of time sanding the extensions and ended up adding some more fiberglass cloth in a few thin spots. Ironically in some places much of the lower extensions will be trimmed off.

Looks better with top and bottom on!

Trimming the lower cowl for the landing gear:

After trying many different methods I found that leveling the plane on the gear and then using a self leveling laser provided good results leveling the cowl.

Lots of marking where to sand, removing the cowl, sanding and replacing the cowl ... it felt like about fifty times!

After initial close trim and sand:

Marked for final trimming:

The laser proved invaluable.

The fit of the two cowl halves is fairly rough. I will be doing a lot of filling and sanding...

More initial fitting of the two halves

Upper skybolt fastener tabs riveted on:

Dimpling the spacer strips that go between the skybolt tabs and the firewall skin:

Drilling spacer strips:

Working on the upper spacer strip:

Thursday, September 27, 2018

Installing Skybolt flange plates


  • After filing and sanding all of the firewall / skin edges I started installing the Skybolt interlocking flange plates. These plates will hold the adjustable quarter turn receptacles for the cowl.
  • I used 3" spacing at the top and transitioned to 3.5" spacing towards the edges of the top cowl.
  • For now all flanges for the top cowl (other than the last one on each edge) have been drilled to the firewall / forward top skin.


Flanges ready to be prepped then riveted:

Progress:

3" spacing starts at the center:

Cleaned up all edges: