Labels

Friday, March 10, 2017

"Permanently" mounted horizontal stabilizer: 2 hours


  • After a fair amount of time figuring out the best bolt / washer combination for the stabilizer I got it bolted on. Hopefully it will not have to come off again!
  • Everything was torqued with my new 1/4" digital torque wrench and torque sealed.
  • Threading the pitch trim wire through the stabilizer went quick. After the exact length is determined I will add a some anti abrasion covering and secure the wire to the wire clips.


Horizontal stabilizer with pitch trim wire:

Pitch trim and rudder lighting wires:

Thursday, March 9, 2017

More aft fuselage work: 3.5 hours


  • Made left side tail stiffener angle and drilled to fuselage.
  • Cleaned, prepped and primed / re-primed stiffeners, various small parts and some of of the horizontal stabilizer and aft fuselage.
  • Installed snap bushings, pop riveted wire tie clips and routed wires in the tail section.
  • Riveted stiffener mod angles in place
  • Riveted upper vertical stabilizer bracket in place


Elevator trim wire going up:

New stiffeners are just below the access panel openings, also tail lighting wire in the middle:

Cleaned and primed aft fuselage deck:

A fair amount of small parts to prime:

Wednesday, March 8, 2017

Misc. aft fuselage work: 4 hours

  • About half the time was spent adding a small modification to the tail section. I read online where a number of RV-7 tail draggers have too much flexing going on under the aft inspection panel. The solution seems to be to add a small stiffener to each side.
  • It took several tries to get the stiffener angle the way I wanted it but after that it was just a matter of drilling out a rivet under each side of the inspection opening and using my rivet fan to lay out the rivet pattern. I got the right side done today, the left side should go faster.
  • I drilled all the holes in the aft fuselage and horizontal stabilizer for routing rudder nav / strobe light wiring and elevator trim servo wiring.
  • I also spent a fair amount of time filing and cleaning up the elevator down stop.

Stiffener mod rivet holes and stiffener angle:

Rivet fan in action (very handy):

The hole left of the green line is for the tail nav / strobe snap bushing:

Another snap bushing hole for the tail nav / strobe wiring:

Tuesday, March 7, 2017

Drilled elevator horns, mounted fuel tank brackets: 2 hours


  • Mounted fuel tank brackets - used my new 1/4" electronic torque wrench - worked great
  • I wasn't happy with the washers acting as spacers for the elevators main bearing so I tried some different combinations and ended up filing one washer down to get a good fit.
  • After everything was lined up I cut out a block of maple on my miter saw to act as a drill guide. I used the drill press to drill the 1/8" guide hole.
  • I drilled the pilot hole then used reamers to open both holes up to 3/16" - the results look good and straight.


Ready to drill for pushrod bolt:

Fuel tank bracket permanently mounted:

Monday, March 6, 2017

Elevator horn drill prep: 2 hours


  • Bolted elevators to horizontal stabilizer to prep for drilling pushrod pilot hole
  • Researched methods for accommodating elevator trim and rudder nav / strobe light wiring
  • Researched methods of checking for elevator alignment. The normal start is to clamp the elevator counterweights to the horizontal stabilizer but this does not guarantee that the trailing edge will be aligned. 
  • To check this I clamped a 6 foot level to the elevators and measured. It came out close to perfect.
Elevators  bolted in place:

Sunday, March 5, 2017

Elevator fitting and misc: 4 hours


  • Prepped, primed and painted fuselage fuel tank brackets
  • Checked and adjusted elevator up / down travel stops on fuselage
  • Researched and prepped for drilling elevator horns for pushrod bolt
  • Drilled pilot hole on one elevator horn for pushrod bolt
  • Removed horizontal stabilizer from fuselage then clamped it back in place inverted to facilitate drilling other pilot hole in elevator horn


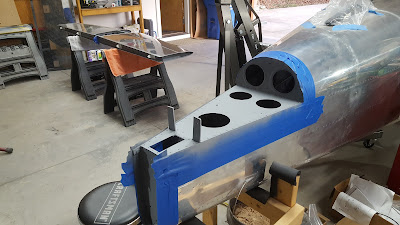
Fuel tank brackets painted:

Working on elevator up / down stops:

Elevator assembly clamped in place inverted for drilling horns: