Labels

Sunday, September 25, 2016

Finished up panel and small parts painting plus instrument panel labels: 8 hours

The following items were done over several days:

Unfortunately the  instrument panel ended up with a good bit of dust spots and other defects. I wet sanded it  with 800 grit, prepped and recoated with 3 coats of the matte epoxy. This turned out very well. I also gave the same treatment to the vent brackets and the engine control bracket.

I was on a painting kick so I gathered up all the small miscellaneous parts involving the canopy and interior. These included the control sticks, canopy slide rail, various canopy handles and latches, and more. These parts got prepped and sprayed with primer, satin black, or left bare metal for clear coating. Everything got a final coat of gloss or matte epoxy. I'm happy with the results for all of it.

For labeling the canopy I have decided to have front panel express make placard out of anodized aluminum. I think this will look great and can be changed in the future if necessary. All the panel design was done on there software so I have all the data to lay out the placards. I have spent several hours on the computer laying these out.

Small parts painting:

Interior canopy latch handle and slider rail:

Thursday, September 15, 2016

More painting: 2 hours


  • Sprayed instrument panel and related parts with 4 coats of Eastwood 2k Matte clear epoxy
  • Put another coat of primer on control sticks and miscellaneous parts

Wednesday, September 14, 2016

Primed instrument panel and other parts: 2 hours

Prepped and primed the instrument panel, engine control bracket, vent brackets, control sticks and some miscellaneous cabin parts. Next step will be multiple coats of matte epoxy.


Tuesday, September 13, 2016

More stick grips and instrument panel: 7 hours

  • Drilled holes for stick grip retaining screws in both sticks
  • Test fit G3X touch units in panel
  • Mocked up engine controls on bench. I ended up liking 2.5" spacing between controls.
  • Cut engine control bracket down to 8" and drilled holes for engine controls.
  • Drilled engine bracket for plate nuts and bracket to instrument panel
  • Drilled instrument panel for garmin nut plate brackets
  • Cut down Garmin nut plate brackets to individual plate nuts
  • Riveted Garmin nut plates to panel and riveted 2 more plate nuts that will secure the vent bracket


Back of instrument panel with plate nuts installed:

Garmin nut plate brackets in place to drill for rivets:

Drilling engine control bracket to instrument panel:

Mocking up engine controls to check spacing - 2.5" on center was good for me.

Test fit of G3X Touch units:


Cut down right control stick with grip and retaining screw:

Monday, September 12, 2016

Stick grips: 3 hours

  • Mocked up stock control sticks with engine control bracket
  • Spent some time in the left seat making sure stick grip height will be comfortable
  • Drilled right stick assembly for c clip button to make stick removable
  • Cut down left and right control sticks for Tosten stick grips. The amount cut off of the original sticks was approximately the length of the Tosten grips plus about 5/8"
  • Checked stick travel with grips attached

Right stick grip:

Left stick grip with mocked up engine control bracket:

Drilling the left stick assembly for the c clip button:

Right removable stick assembly:


Friday, September 2, 2016

More work in cockpit: 2 hours

I went ahead and ordered the carpet for the cockpit floor and baggage area. It was fun to put the rudder pedal assembly in and figure out where I want my heel pad. I also did some work on the instrument panel such as filing and smoothing edges for a better fit. I have a few plate nuts to rivet on and I will be ready to paint the panel.

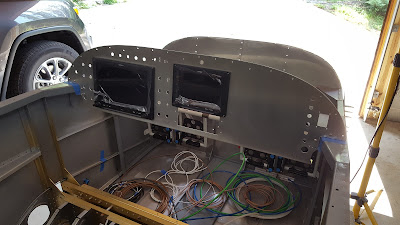
I also temporarily put the panel in place to measure clearance for the control stick grips.

Checking rudder pedal spacing for carpet heel pad: