Labels

Friday, August 29, 2014

Painting interior panels: 1.7 hours

I put a second coat on on the panels. Unfortunately one panel had too many defects and had to be redone.

As exciting as watching paint dry:

Thursday, August 28, 2014

Flap work and painting: 3.7 hours

This session I accomplished the following: riveted plate nuts to flap brace, riveted flap sensor bracket to flap brace, installed plate nuts for center flap bearing block, prepped interior parts for painting, and painted various parts.

First coat of Ford Tractor Gray:

Parts curing in basement:

Tuesday, August 26, 2014

Flap mechanism work: 6.4 hours

This work session I accomplished the following: primed flap mechanism side covers, fitted and drilled flap sensor bracket, made flap sensor linkage, fine tuned flap sensor position by running flap motor full travel in each direction (many times), dis-assembled and primed flap actuator components, and drilled for plate nuts on rear brace of flap actuator cover.

Determining flap position sensor location:

Monday, August 25, 2014

Flap position sensor bracket and more side cover work: 2.2 hours

After reviewing many other builder's designs I made a bracket for the flap position sensor. This is one part of the kit where you are on your own to come up with a good solution. The flap sensor is not mandatory but knowing where the flaps are positioned lets you display flap position on the Garmin PFDs and it allows the VPX electronic power system to do some neat things like not let you extend the flaps if your airspeed is to high and moving the flaps in increments rather than having to guestimate flap position with the standard momentary on off on switch.

I also continued tweaking the fit of the flap actuator side panels.

 Flap position sensor sitting on my simple bent metal bracket:

Working on side panels:

Thursday, August 14, 2014

Flap actuator side panels: 2.5 hours

I started fitting the flap actuator side panels and then used them as a template to drill the rear brace for platenuts. These covers are very thin pieces that require a lot of tweaking to get a good looking fit without gaps.

Flap actuator side covers:

The other side:

Wednesday, August 13, 2014

Flap motor work and misc. 5.6 hours

I got a few miscellaneous tasks done including: removed a forward temporary brace from the fuselage, unpacked my Skybolt fastener kit for the engine cowling - very nice, and unpacked my Nova angle air drill - also very nice.

I had received my replacement F-680 block so I re-did that part and it turned out well. I also go the tunnel cover notched to fit around that block.

The highlight was fitting the flap motor, drilling the motor to the support bracket and hooking it up to a 12 volt battery and checking it's range of motion. Everything worked well.

Checking flap mechanism range of motion:


Monday, August 4, 2014

Flap work: 3.5 hours

This session: more work on flap actuator channel and mounting plate, riveted flap actuator mounting plate and bottom channel attachments, prepped and riveted upper channel attachment plate, started working on fitting the flap actuator, and organized the parts for the forward tunnel cover.

I also unpacked and inventoried my new Garmin GTN-650 from Stein Air. This is a Garmin's touchscreen WAAS GPS, Nav / Com combo unit. It will be the core system for all ifr navigation and communication however I will also have two other backup vfr GPS sources and the ability to connect a handheld back up com radio!

Flap actuator positioned in support channel:

Unpacking GTN-650 and antenna:

Auxiliary fuel pump mount, forward tunnel cover and heater plenum:


Saturday, August 2, 2014

Flap mechanism work: 6.3 hours

This session: flap bearing block (unfortunately this part did not turn out right so it will have to be redone), flap actuator temporary install, fabricated various brackets and plates, prepped and primed flap actuator channel, drilled and deburred baggage tunnel cover, drilled flap actuator motor assembly for safety wire.

Flap actuator weldment:

Tricky drilling a tiny hole in the actuator for Van's service bulletin:

Drilling the other part of the hole for safety wire to prevent the actuator rod end bearing from possibly coming loose.

Various fabricated brackets:

 Flap actuator channel:

Temporary install:


Friday, August 1, 2014

Pushrod, parachute handle, instrument panel and flap motor work: 5 hours

This session I accomplished the following: finished the rear spar carry through opening, prepped and primed my parachute handle bracket & trim cover, I also touched up the forward pushrod, I got the BRS handle permanently installed then double checked the fit of the cover plate and tunnel cover, and I started working on the flap motor mechanism.

I also had some fun playing with instrument panel mockups. Garmin has released a new 7" version of the G3X Touch EFIS. I'm trying to decide what combination of instruments will work the best for me.

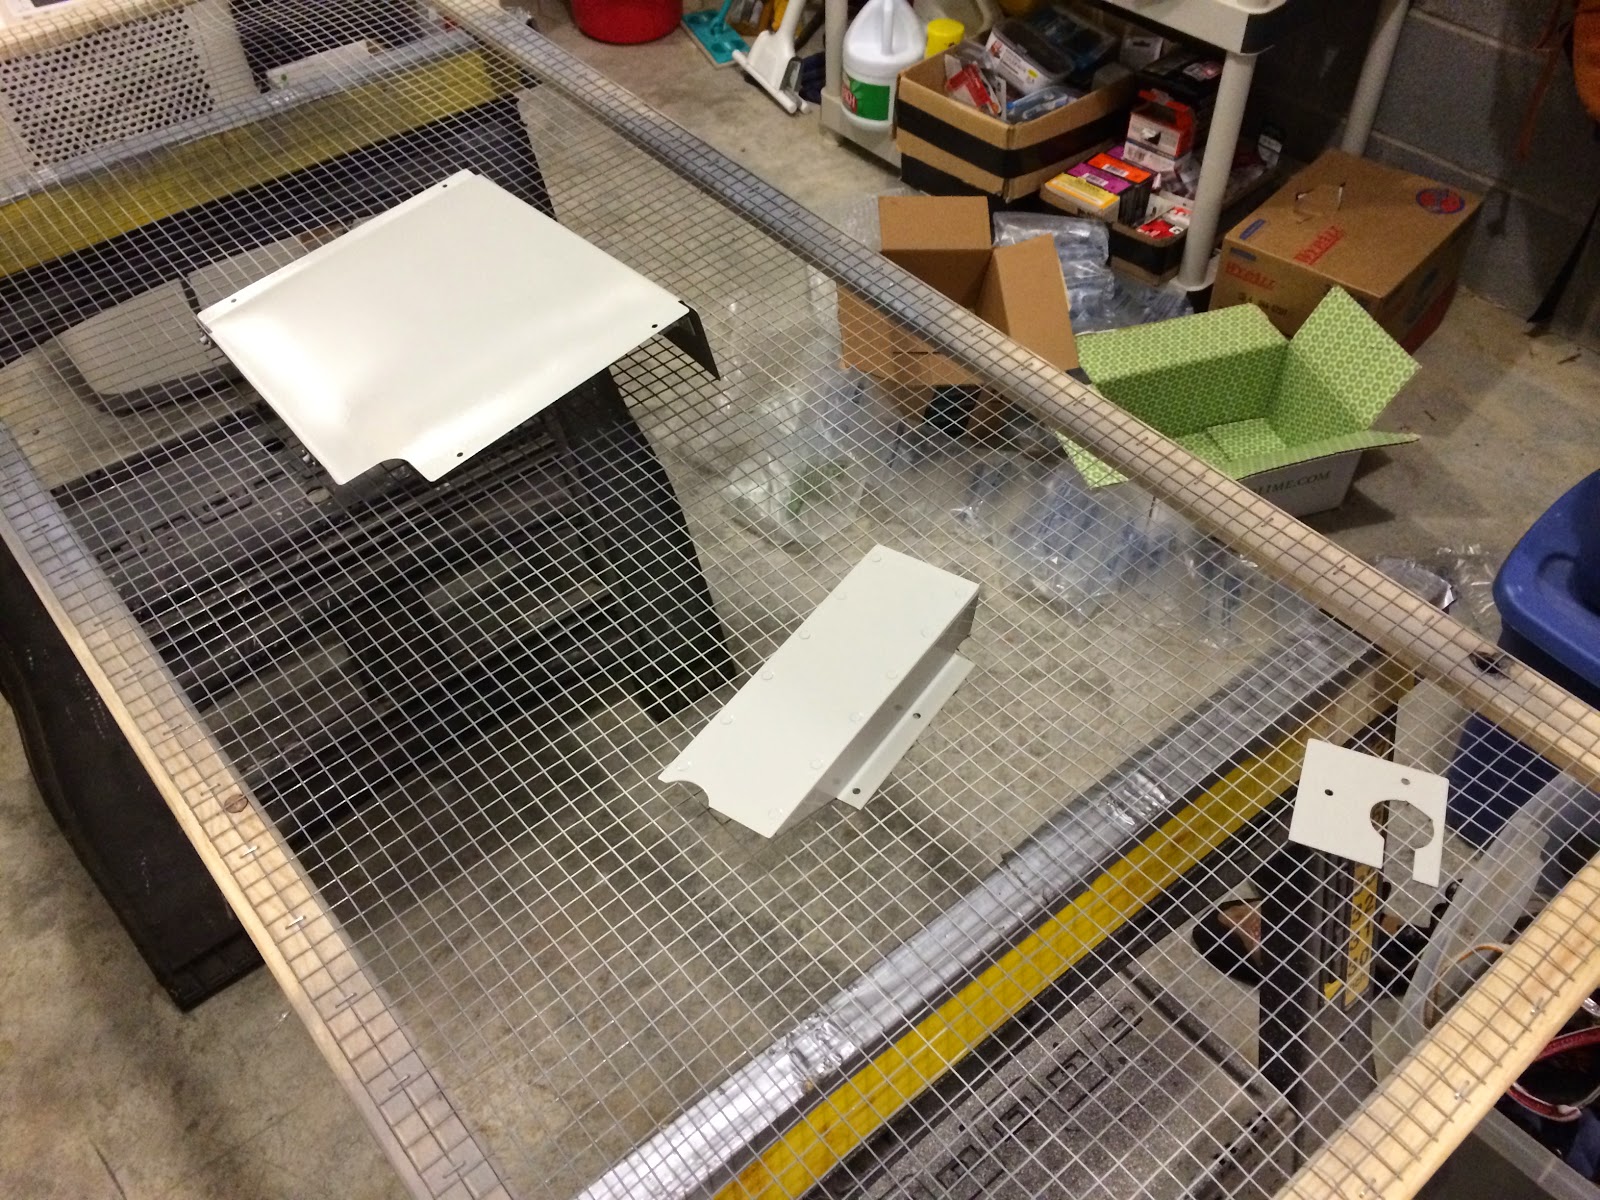
Parachute handle installed with cover plate and tunnel cover:

This is my original and still preferred panel. This has a G3X Touch 10" EFIS, a GTN 650 nav / com / gps, a GMC 305 auto pilot control, a GRT Mini X backup EFIS and a simple panel mount for a tablet on the right. This setup leaves room for everything needed with out having to resort to a larger custom panel.

This is an option using two G3X 7" EFIS units with two ADAHRS (gyros) for redundancy. This setup has some advantages but I found that I didn't care for the smaller display compared to the 10" EFIS. 

The final configuration I looked at is below. The combination of the 10" and 7" EFIS are nice but they don't quite leave enough space on the panel for all the other various switches and controls that need to be there. I'm still thinking about it though.

The following pictures are to document the BRS parachute handle install: