Labels

Monday, July 31, 2017

Firewall work: 1 hour


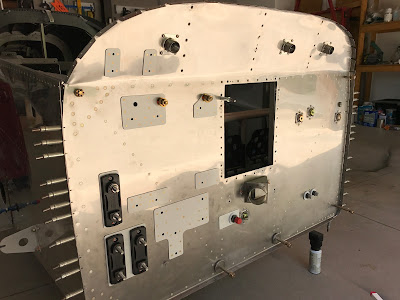
  • Installed brake reservoir mount. AN fittings and an aluminum tube will connect this to the bulkhead fitting after the forward fuselage structure is installed.
  • Installed alternator fuses and hardware.
  • I also started on cutting up some 1/16" rubber sheeting that will be glued into the battery boxes to give a little padding.


Firewall progress:

Saturday, July 29, 2017

Finished firewall doubler riveting: 4 hours


  • Finished riveting all doublers to firewall
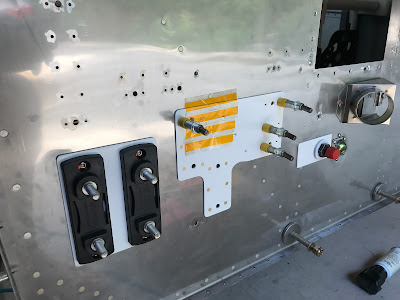
  • Mounted all ANL fuse holders
  • Mounted "forest of tabs" ground bus
  • Prepared battery and start contactors for mounting. Mounting bolts on order.


Contactors ready to be installed:

All firewall doublers in place:

Forest of tabs ground bus:

Riveting in progress: (used large piece of rivet tape to protect paint)

Alternator fuses and insulated bus bar:

Friday, July 28, 2017

More firewall and forward fuselage: 8 hours


The following items were done over several days-
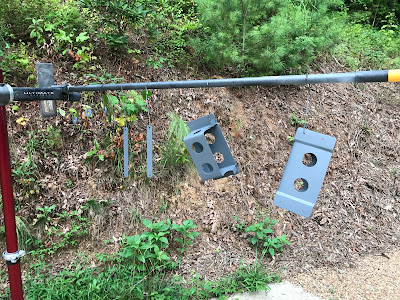
  • Finished painting firewall doublers and battery boxes
  • Opened up all holes on forward top skin for cherry max rivets
  • I decided to add a anl fuse for the main VPX power feed so I made another doubler and drilled it to the firewall. I also made a copper bus bar to connect it.
  • I started riveting the doublers to the firewall. I started with the fuse holder doubler for the alternators.
  • I removed the forward top skin and support structure. I also located where I will mount the manifold pressure sensors for the electronic ignition.


Finishing up the painting:

Forward top skin drilled:

Locating the fuse holder for the main power feed:

Drilling main power feed doubler:

Checking fit with bus bar:

Alternator fuse holder doubler riveted on:

Locating manifold pressure sensor mounting location:

Monday, July 17, 2017

Forward top skin: 3 hours


  • Removed forward top skin and used old forward top skin to drill mounting holes for defog fans and transfer the cut out pattern for the fans.
  • Deburred and dimpled forward top skin and sub-panel
  • Re-attached forward skin - ready to be reamed for the Cherrymax NAS rivets.

Forward skin ready for next stage:

Edge finishing and deburring:

Thursday, July 13, 2017

Firewall forward and forward top skin 2.0: 6 hours


  • Prepped, primed and painted battery boxes and some aluminum spacers for the firewall and a previously installed doubler
  • Curved fuselage forward top skin with large piece of pvc pipe. I taped the edge of the skin to the pipe and rolled it on the work bench. I also held the pipe inboard from the edge and put a little more curve in. It turned out great.
  • I also put a "strong" edge roll on each side of the skin where it will attach to the longerons.
  • All the above paid off. The skin now fits very well and is very tight but did not require any thing beyond a few wing nut clecos (in addition to standard clecos) to get it in place.
  • I did the initial drilling of the new skin to the forward fuselage ribs and sub panel.
  • I also received a new gadget ... The Grove Aircraft Acrovalve. This is a check valve vent for the brake reservoir so if you are doing aerobatics you won't spill brake fluid in the engine compartment.


Grove Acrovalve on brake reservoir, old vent fitting to right:

Very happy with fit on the 2.0 skin:

The wing nut clecos were helpful in several spots:

After curving the skin with the large PVC pipe:

Reading to paint the battery boxes:

Ready to paint a doubler I installed some time ago:

Saturday, July 8, 2017

Finished making firewall doublers: 3 hours


  • Fabricated the doublers for the brake fluid reservoir
  • Deburred and cleaned firewall
  • Prepped and primed doublers


Prepping doublers and battery boxes for priming:

Drilling brake reservoir doubler to firewall:

Friday, July 7, 2017

More firewall doublers: 4.5 hours


  • Fitted left battery doubler plates. After reviewing fit with engine firewall recess. I decided to modify the doubler plates and mount the battery directly over the firewall recess with a washer for a spacer.
  • Drilled firewall recess panel and firewall for various plate nuts
  • Drilled right battery box to firewall
  • Fabricated lower and upper right battery doublers
  • Upper battery doubler also supports the brake reservoir fitting and the other ground bus bolt.


Drilling upper right battery doubler:

Drilling right battery box to firewall:

Thursday, July 6, 2017

Firewall fuses and battery mount: 4 hours


  • Fitted ANL fuse holder doubler
  • Drilled left battery box to firewall
  • Fabricated left battery doublers. Upper battery doubler also works as ground bus bolt doubler


Left battery doubler plates:

Drilling left battery box to firewall:

Drilling ANL fuse holder doubler to firewall (contactor doubler to right):

Wednesday, July 5, 2017

Battery contactor doubler: 2 hours


  • Drilled battery contactor doubler to firewall
  • Deburred firewall and doubler. Countersinked doubler for flush rivets
  • Prepped and primed doubler


Drilling doubler to firewall:

Tuesday, July 4, 2017

More firewall: 3 hours


  • Installed the "spherical metal grommets" for the propeller and mixture controls
  • Started working on the doubler plate to mount the start and battery contactors:


Working on doubler plate for mounting contactors:

All engine control cable grommets now installed:

Sunday, July 2, 2017

Firewall pass throughs: 4 hours


  • Drilled holes for wiring and throttle cable pass through's using 1" bi-metal hole saw backed up with a piece of 2x4. 
  • Drilled and installed wiring pass through fittings. These stainless steel fittings were installed with a layer of fireproof sealant. They will later get wrapped in fire sleeve with the wires in the middle of another fire sleeve and more sealant.
  • Installed throttle cable spherical fitting. This fitting was relocated slightly to clear the fuel line.


Throttle cable spherical pass through fitting:

Wiring pass through installed:

Wiring pass through holes: